Broken Water Heater in Grapevine, TX? 7 Quick Fixes to Try First

Is your water heater acting up in Grapevine, TX? Before you call in a professional, there are some quick fixes you can try on your own. From checking the power and thermostat settings to inspecting for leaks, these steps might just save you a service call. Curious about what else you can do to get your hot water flowing again? Let’s investigate these practical solutions together.
Check the Power Supply
Before diving into repairs, it’s vital to check the power supply to your water heater. Start by ensuring that the unit is plugged in securely. If it’s a gas water heater, verify that the gas supply is turned on.
Next, look for any blown fuses or tripped circuit breakers in your electrical panel; resetting them might do the trick. If you notice any flickering lights or other electrical issues in your home, it could indicate a broader problem with your electrical system, so don’t ignore it.
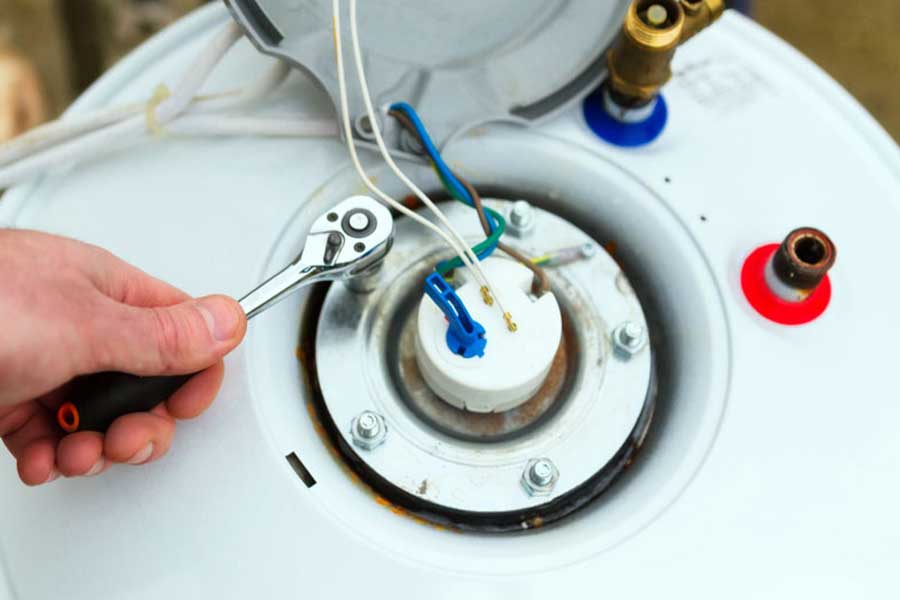
Additionally, inspect any visible wiring for signs of damage or wear. If everything seems in order, but your heater still isn’t functioning, it might be time to call in a professional. A professional can provide expert diagnostics and repairs that ensure your water heater is functioning optimally and safely.
Inspect the Thermostat Settings
An often overlooked step in troubleshooting your water heater is inspecting the thermostat settings.
First, check to verify the thermostat’s temperature is set correctly. Most water heaters should be set between 120°F and 140°F for peak performance. If it’s set too low, you mightn’t get enough hot water.
Next, look for any discrepancies between the thermostat reading and the actual water temperature. If you have a multimeter, you can measure the temperature directly from the tap. If there’s a significant difference, it may indicate a malfunctioning thermostat.
Finally, confirm there’s no debris or dust blocking the thermostat, as this might affect its accuracy.
Regularly checking and maintaining these settings can prevent larger issues down the line. If you’ve adjusted the thermostat and still face problems, it might be time to call in a professional for further assistance. Professional help can ensure that you have reliable hot water services tailored to your home’s specific needs.
Examine the Circuit Breaker
If you’ve checked the thermostat settings and your water heater still isn’t working, the next step is to examine the circuit breaker. This is often a quick fix that can save you time and money.
Head to your home’s electrical panel and locate the breaker that controls the water heater. If you see it in the “off” position, simply flip it back to “on.” If it’s already on, check if it’s tripped — a tripped breaker will be in the middle position. If it’s tripped, turn it off and then back on again.
If the breaker continues to trip, there may be an underlying electrical issue that needs professional attention. It’s advisable to contact a trusted emergency plumber to diagnose the problem. Remember, safety is key, and handling electrical components can be risky if you’re unsure.
Flush the Tank
Flushing your water heater is crucial for maintaining its efficiency and longevity. It helps remove sediment buildup that can affect performance and lead to costly repairs. You should flush the tank at least once a year to keep everything running smoothly. Regular maintenance, such as water heater replacement, can further enhance the lifespan and efficiency of your unit.
Importance of Flushing
Regularly flushing your water heater is vital for maintaining its efficiency and longevity. Over time, sediment builds up in the tank, which can lead to reduced heating efficiency, increased energy costs, and even damage to the unit.
By flushing your water heater, you remove this sediment, allowing the tank to operate more effectively. This simple maintenance task can help prevent unexpected breakdowns and extend the life of your water heater, saving you money in the long run.
Furthermore, a well-maintained water heater provides better hot water quality, ensuring your family enjoys clean and safe water for daily use.
Don’t overlook this important step in your home maintenance routine; your water heater will thank you!
How to Flush
To guarantee your water heater operates efficiently, it’s essential to flush the tank periodically.
Start by turning off the power supply or gas to the heater. Next, connect a garden hose to the drain valve at the bottom of the tank and run it to a nearby drain or outside. Open the drain valve and let the water flow out. You may want to open the pressure relief valve on top for faster draining.
Once it’s empty, close the drain valve and remove the hose. Turn the water supply back on and let the tank fill. Don’t forget to restore power or gas once it’s full.
Flushing helps remove sediment, improving efficiency and extending the lifespan of your heater.
Frequency of Flushing
Maintaining your water heater’s efficiency hinges on how often you flush the tank. Ideally, you should flush it at least once a year to remove sediment buildup.
This sediment can cause your heater to work harder, leading to inefficiency and potential damage. If you notice a decrease in hot water supply or hear unusual noises from the tank, consider flushing it more frequently—every six months may be necessary in areas with hard water.
Regular flushing helps extend the life of your water heater and guarantees it operates smoothly. By staying on top of this maintenance task, you’ll not only save on energy costs but also enjoy consistent hot water when you need it.
Don’t neglect your tank; it’s worth the effort!
Look for Leaks
Have you noticed any unusual damp spots or water pooling around your water heater? If so, it’s time to investigate for leaks.
Start by checking the connections and fittings; loose or corroded connections often lead to water escaping. Look closely at the tank itself for any signs of rust or holes. Don’t forget to inspect the drain valve, as it can sometimes be the culprit of leaks.
If you find any leaks, tightening connections or replacing worn-out parts might solve the problem.
Nevertheless, if the tank is considerably corroded, you may need to evaluate a replacement. Remember, even small leaks can lead to bigger issues down the road, including water damage and increased energy costs.
If you’re unsure, don’t hesitate to call a professional like CW Service Pros to assess the situation and guarantee your home stays safe and dry.
Test the Pressure Relief Valve
To keep your water heater safe, you need to test the pressure relief valve.
First, locate the valve and check for any leaks.
Then, it’s time to test the valve’s operation to guarantee it works properly.
Locate the Pressure Valve
Locating the pressure relief valve on your water heater is a crucial step in guaranteeing its safe operation. This valve helps release excess pressure, preventing potential leaks or bursts.
To find it, look for a small pipe or lever near the top or side of the tank. It’s usually made of metal and may have a discharge tube pointing downwards.
Once you identify the valve, check its position and verify it’s not blocked by any debris or insulation. If it seems corroded or damaged, it might need replacement.
Taking the time to locate and assess this valve can save you headaches down the road, keeping your water heater functioning safely and efficiently.
Check for Leaks
Checking for leaks is vital to guarantee your water heater operates safely and efficiently.
Start by examining the area around the pressure relief valve. Look for any signs of water pooling or damp spots. If you notice any leaks, it’s important to address them immediately to prevent further damage.
Additionally, inspect the pipes connected to the water heater for any visible cracks or corrosion. A small leak can quickly escalate into a significant issue if left unchecked.
If you find a leak, you may need to tighten connections or replace worn-out seals. Remember, if you’re unsure or the leak persists, it’s best to call a professional like CW Service Pros to verify your water heater is in top shape.
Test Valve Operation
One crucial aspect of maintaining your water heater is testing the pressure relief valve. This safety feature prevents excessive pressure buildup that could lead to a dangerous situation.
To test it, locate the valve on the side or top of the tank. Place a bucket underneath to catch any water that may escape. Pull the lever gently to release some pressure. If water flows smoothly and the valve resets itself, it’s functioning properly.
Nevertheless, if it leaks continuously afterward, you may need to replace it. Regularly testing this valve guarantees your water heater operates safely and efficiently.
If you’re unsure or encounter issues, don’t hesitate to call a professional like CW Service Pros for assistance.
Assess the Anode Rod
The anode rod is a crucial component in your water heater that helps prevent corrosion and extends its lifespan. Over time, this rod can deteriorate and become less effective, leading to rust and leaks.
To assess it, start by turning off your water heater and disconnecting the power supply. Next, locate the anode rod, usually found on the top of the tank. Carefully remove it using a socket wrench.
Inspect the rod for signs of corrosion or notable wear. If it’s heavily corroded or reduced to less than half its original size, it’s time to replace it. A new anode rod can greatly improve your water heater’s durability. Always use a compatible rod for your specific heater model.
If you’re unsure or uncomfortable handling this task, don’t hesitate to call a professional. At CW Service Pros, we’re here to help keep your water heater in top condition.
Conclusion
If you encounter a broken water heater in Grapevine, TX, don’t panic! By following these quick fixes, you can often breathe new life into your unit without calling in the professionals. Sometimes, it just needs a little TLC to get back on track. Remember, regular maintenance can prevent future headaches, so take the time to care for your water heater. With a bit of patience and effort, you’ll be enjoying hot showers again in no time!


